Fragmentary Fisher-Price

Fisher-Price made toys that I know I loved despite infantile amnesia. Children generally cannot remember events from before the age of three and start remembering things consistently around the age of four. We adults can access fragment memories, which are isolated moments without context, from around age three. Scattered among my fragments, with reinforcement from old photographs and home movies, are memories of Fisher-Price, which created about 5,000 different toys from 1930 to 2024.

Irving Price, Helen Schelle, and Herman Fisher

Herman Fisher had been manufacturing, selling, and advertising games for a company in Churchville, New York. He and some investors tried to buy out the firm, but they were unsuccessful. So Fisher teamed up with Irving Price, the mayor of East Aurora, New York, who had been an executive at Woolworth. Price raised $100,000 in capital for them to start their own firm, with the following creed: “Fisher-Price toys should have intrinsic play value, ingenuity, strong construction, good value and action.”

They teamed up with Helen Schelle, who had previously operated Penny Walker Toy Shop in Binghamton, New York to create durable toys made of heavy steel parts and ponderosa pine, with colorful lithographic labels. Schelle and Price’s wife, illustrator-artist Margaret Evans Price, collaborated on the company’s early successful products.

Wobbles was a new pup in 1964, while Snoopy Sniffer had been around for almost 30 years
Wobbles was made from 1964-1967

The company’s first major success was The Snoopy Sniffer, a pull toy introduced in 1938. They were producing its third iteration when I was a kid, and that product would continue to 1980. But for my first birthday in 1967 I received a different Fisher-Price dog from my uncle Tim: Wobbles, which made an arf-arf noise and had four wobbly wheels to make his spring tail bob, his wooden head turn, and his big plastic ears rock. It was priced at $2.35 in the 1964 Sears Christmas catalog, or about $23 in 2024 dollars, and it was sold for only four years.

Schelle had retired in 1957, while Price held on as chairman of the board until 1964. But Irving Fisher was still running the company when I received Wobbles along with two additional Fisher-Price toys on that first birthday: Cry Baby Bear from the neighbors on one side of our house, and the Chatter telephone from the neighbors on the other side.

My first birthday with my parents and neighbor Jamie Robbins was a bonanza with Cry Baby Bear, Wobbles, the Chatter telephone, and a toy piano
Cry Baby Bear from 1967-1969

Cry Baby Bear was sold from 1967 to 1969. When pulled, its head bobbed up and down while it made a crying sound. It sold for $1.88 by JC Penney, which would be about $17 in 2024 dollars.

In my infancy I played with a Fisher Price Roly Poly Chime Ball, although I only know that because we have a home movie of me playing with one in the bathtub. Fisher Price produced those from 1967 to 1985.

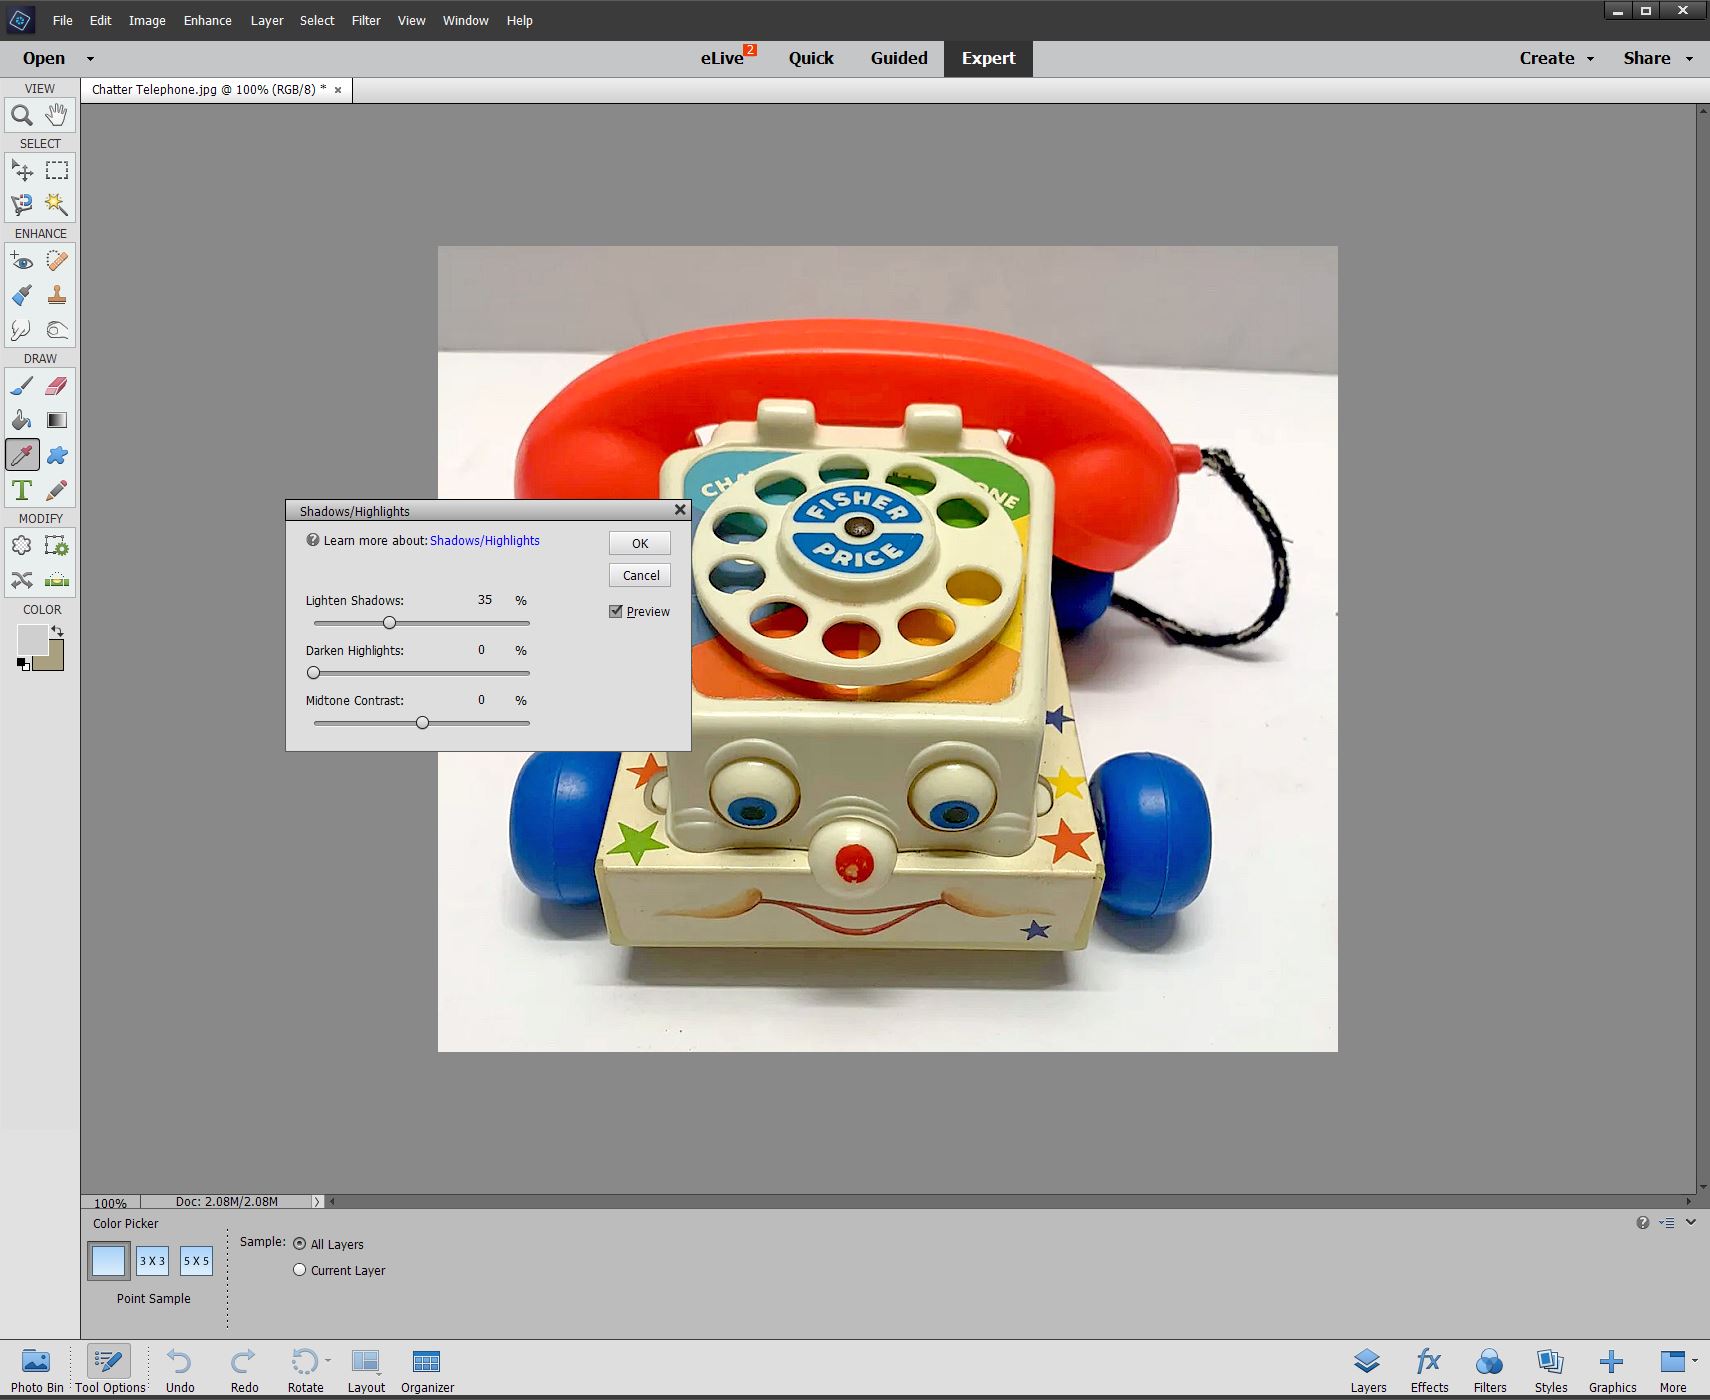
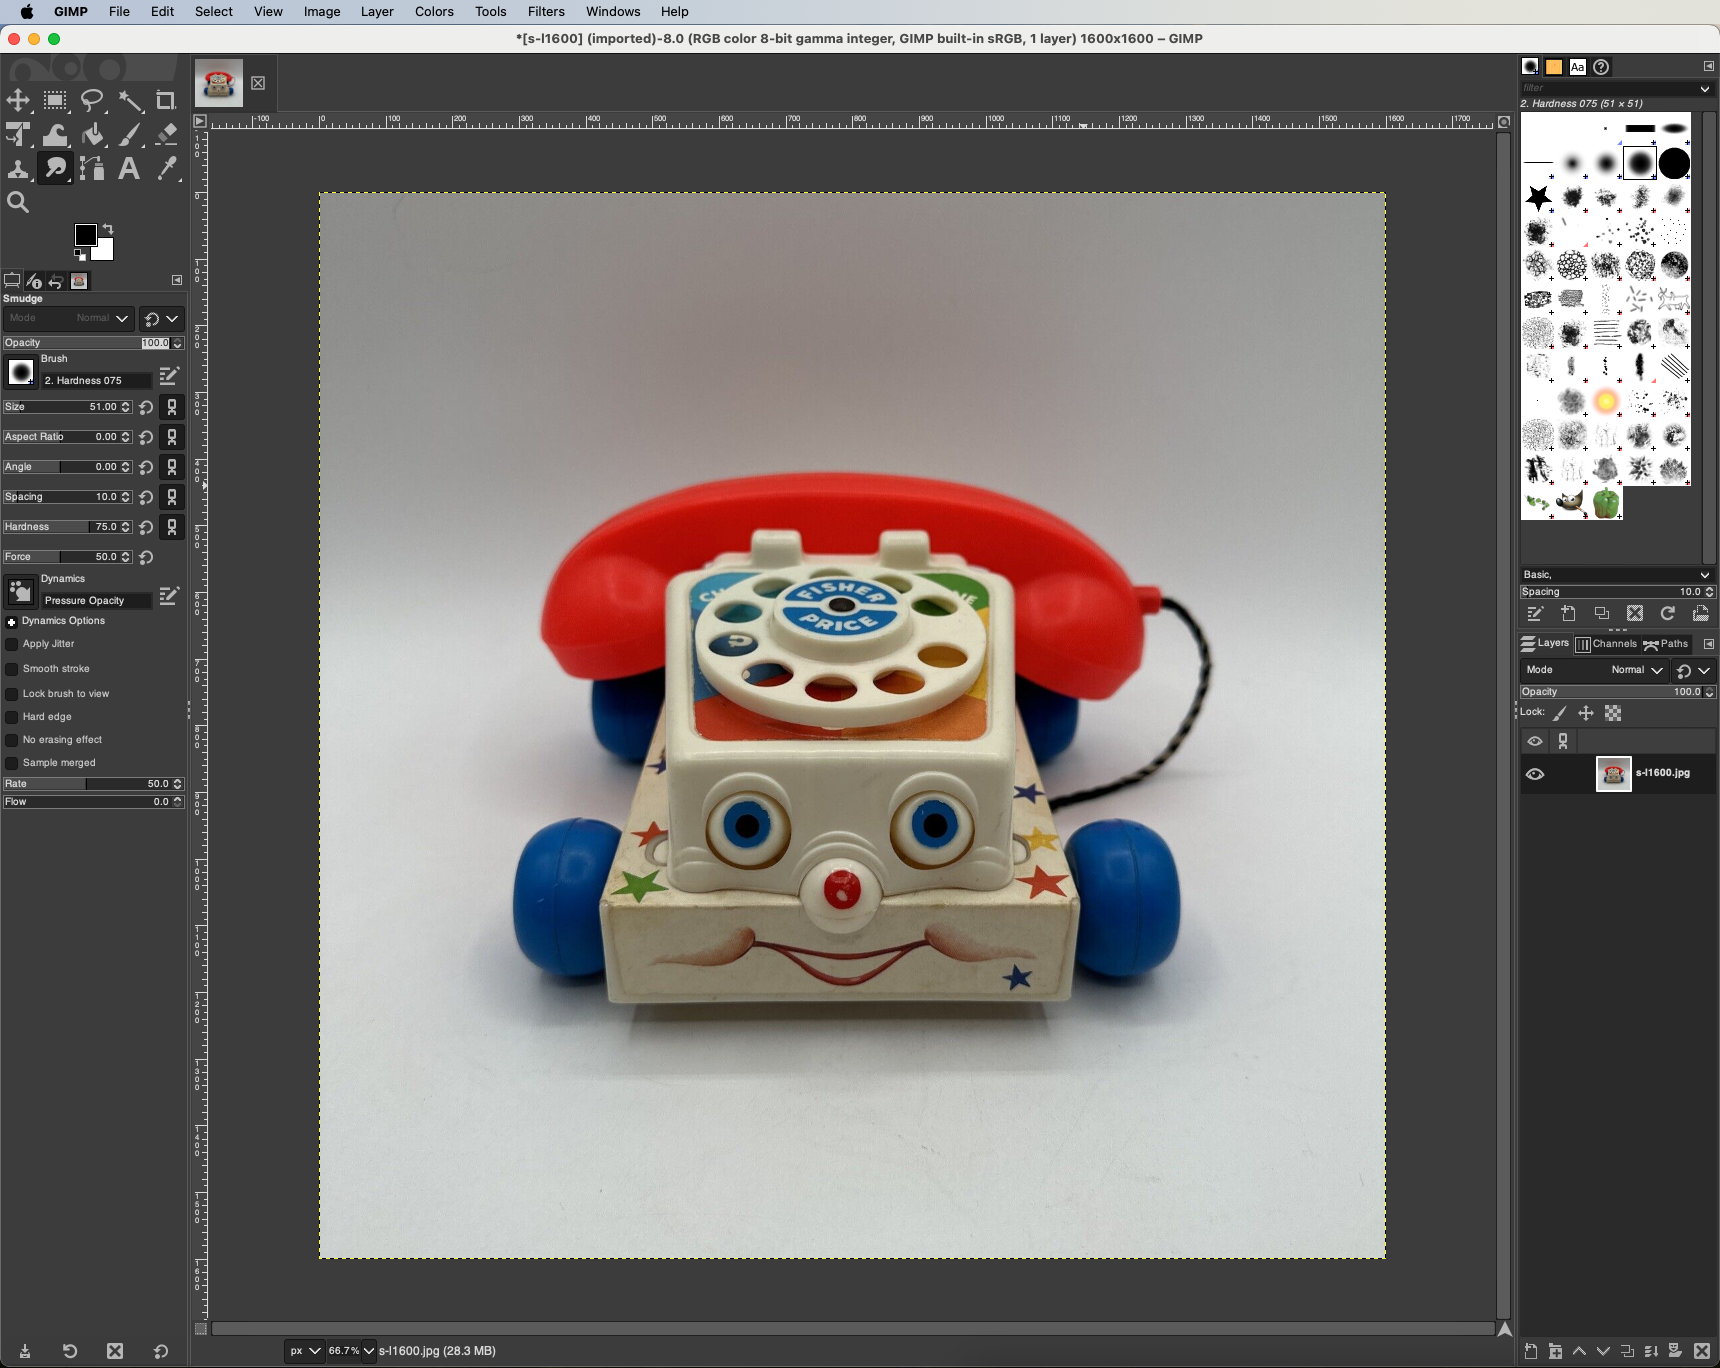
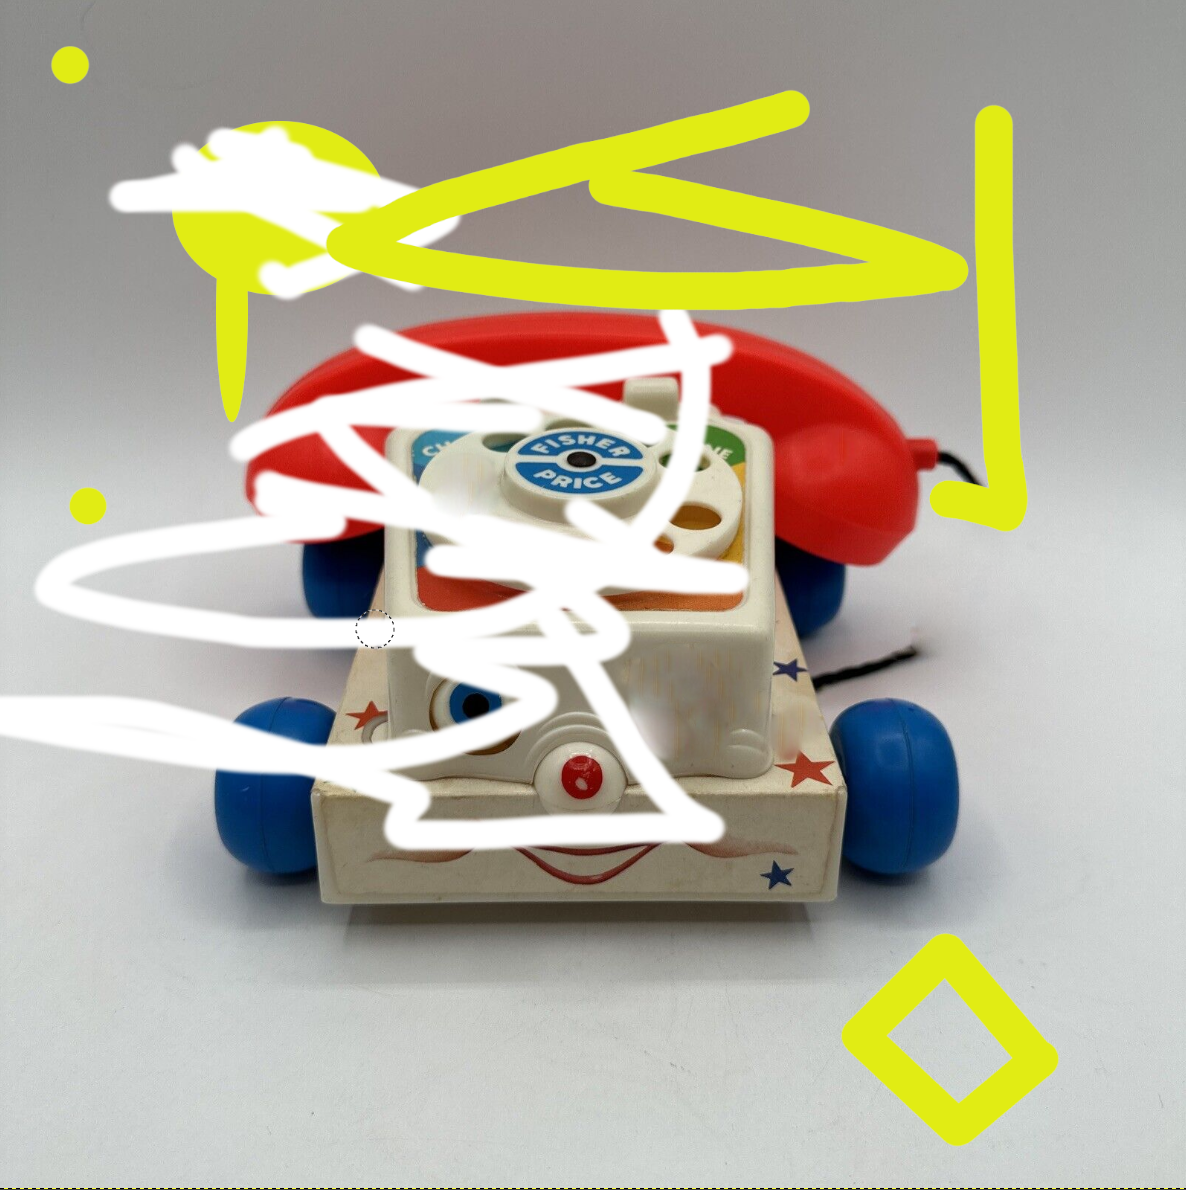
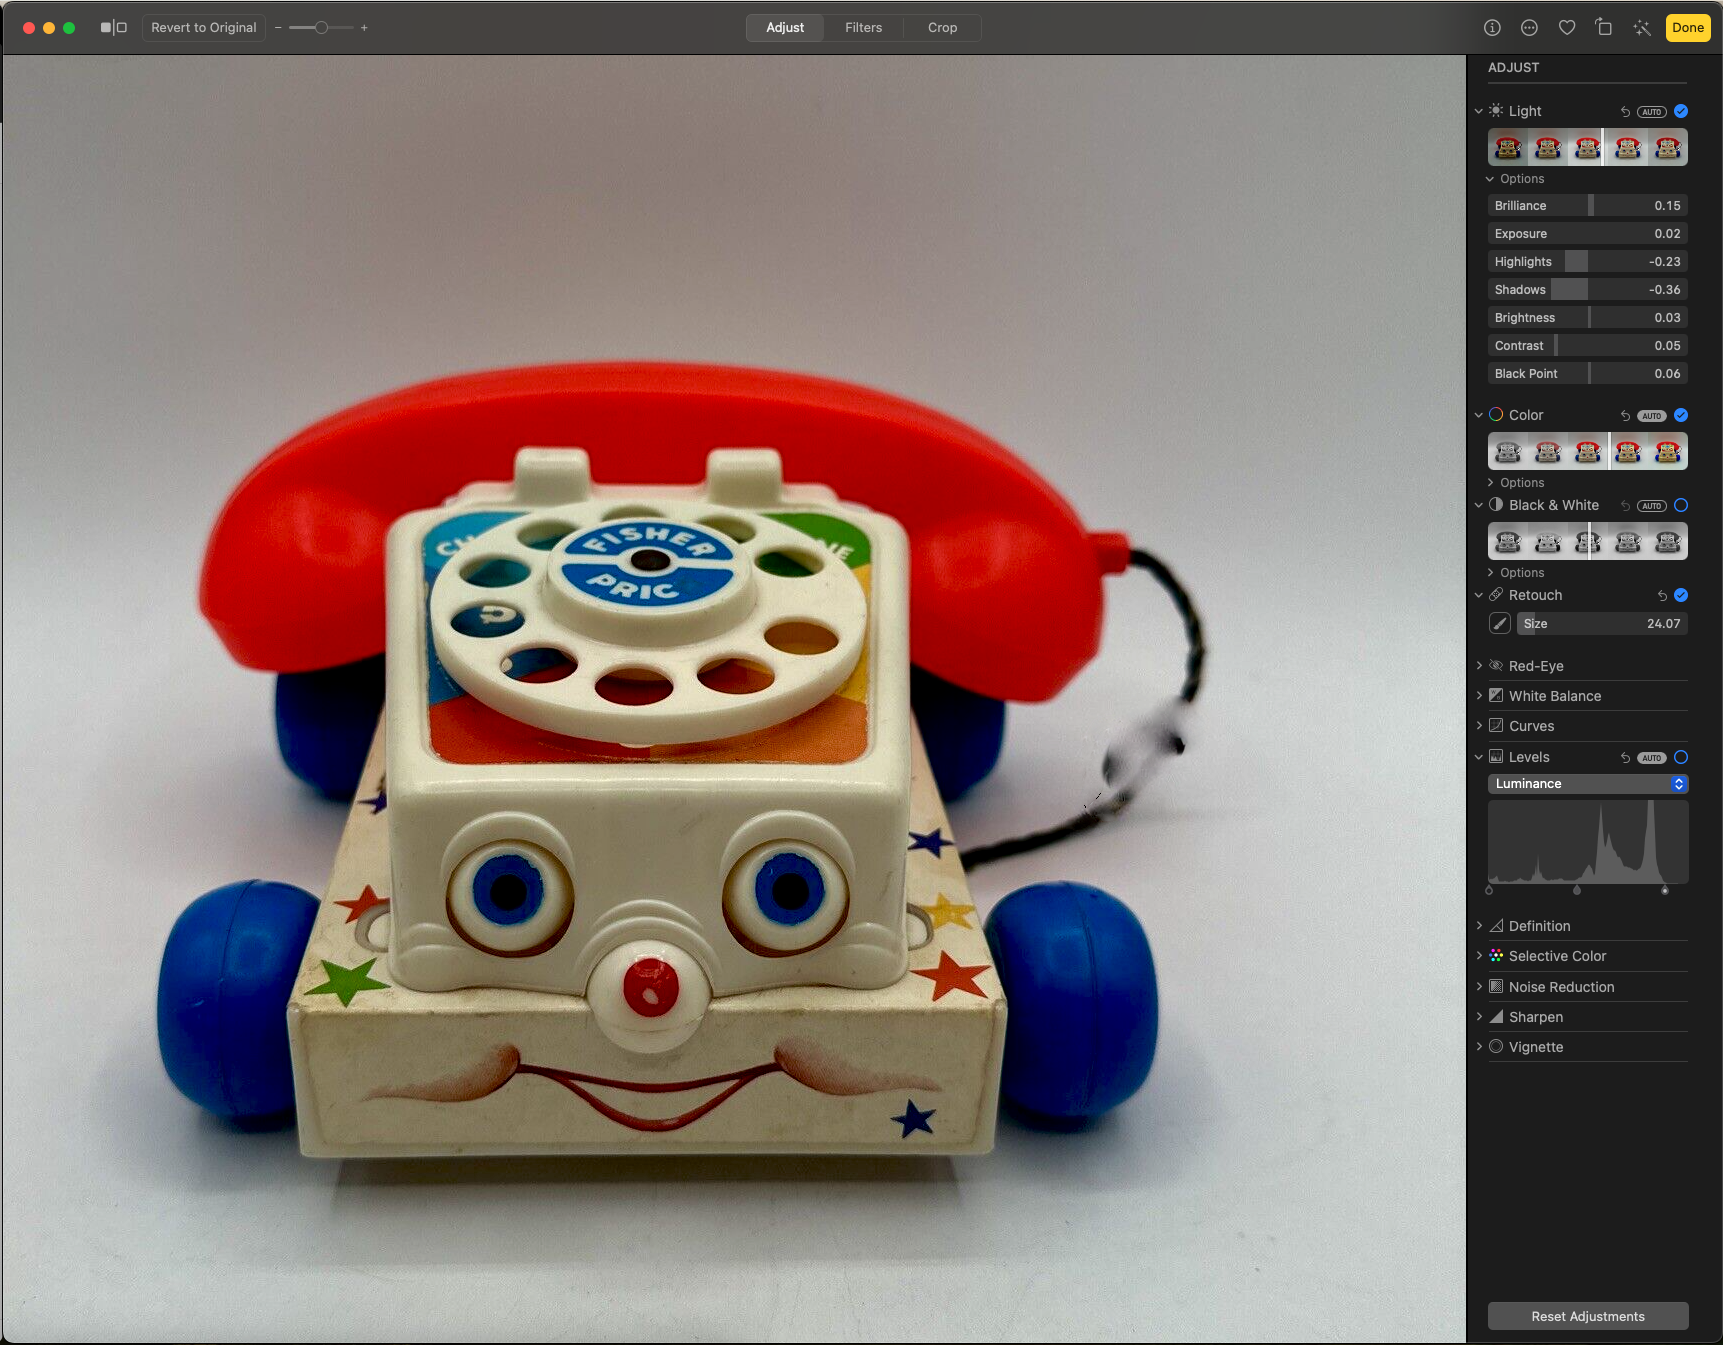
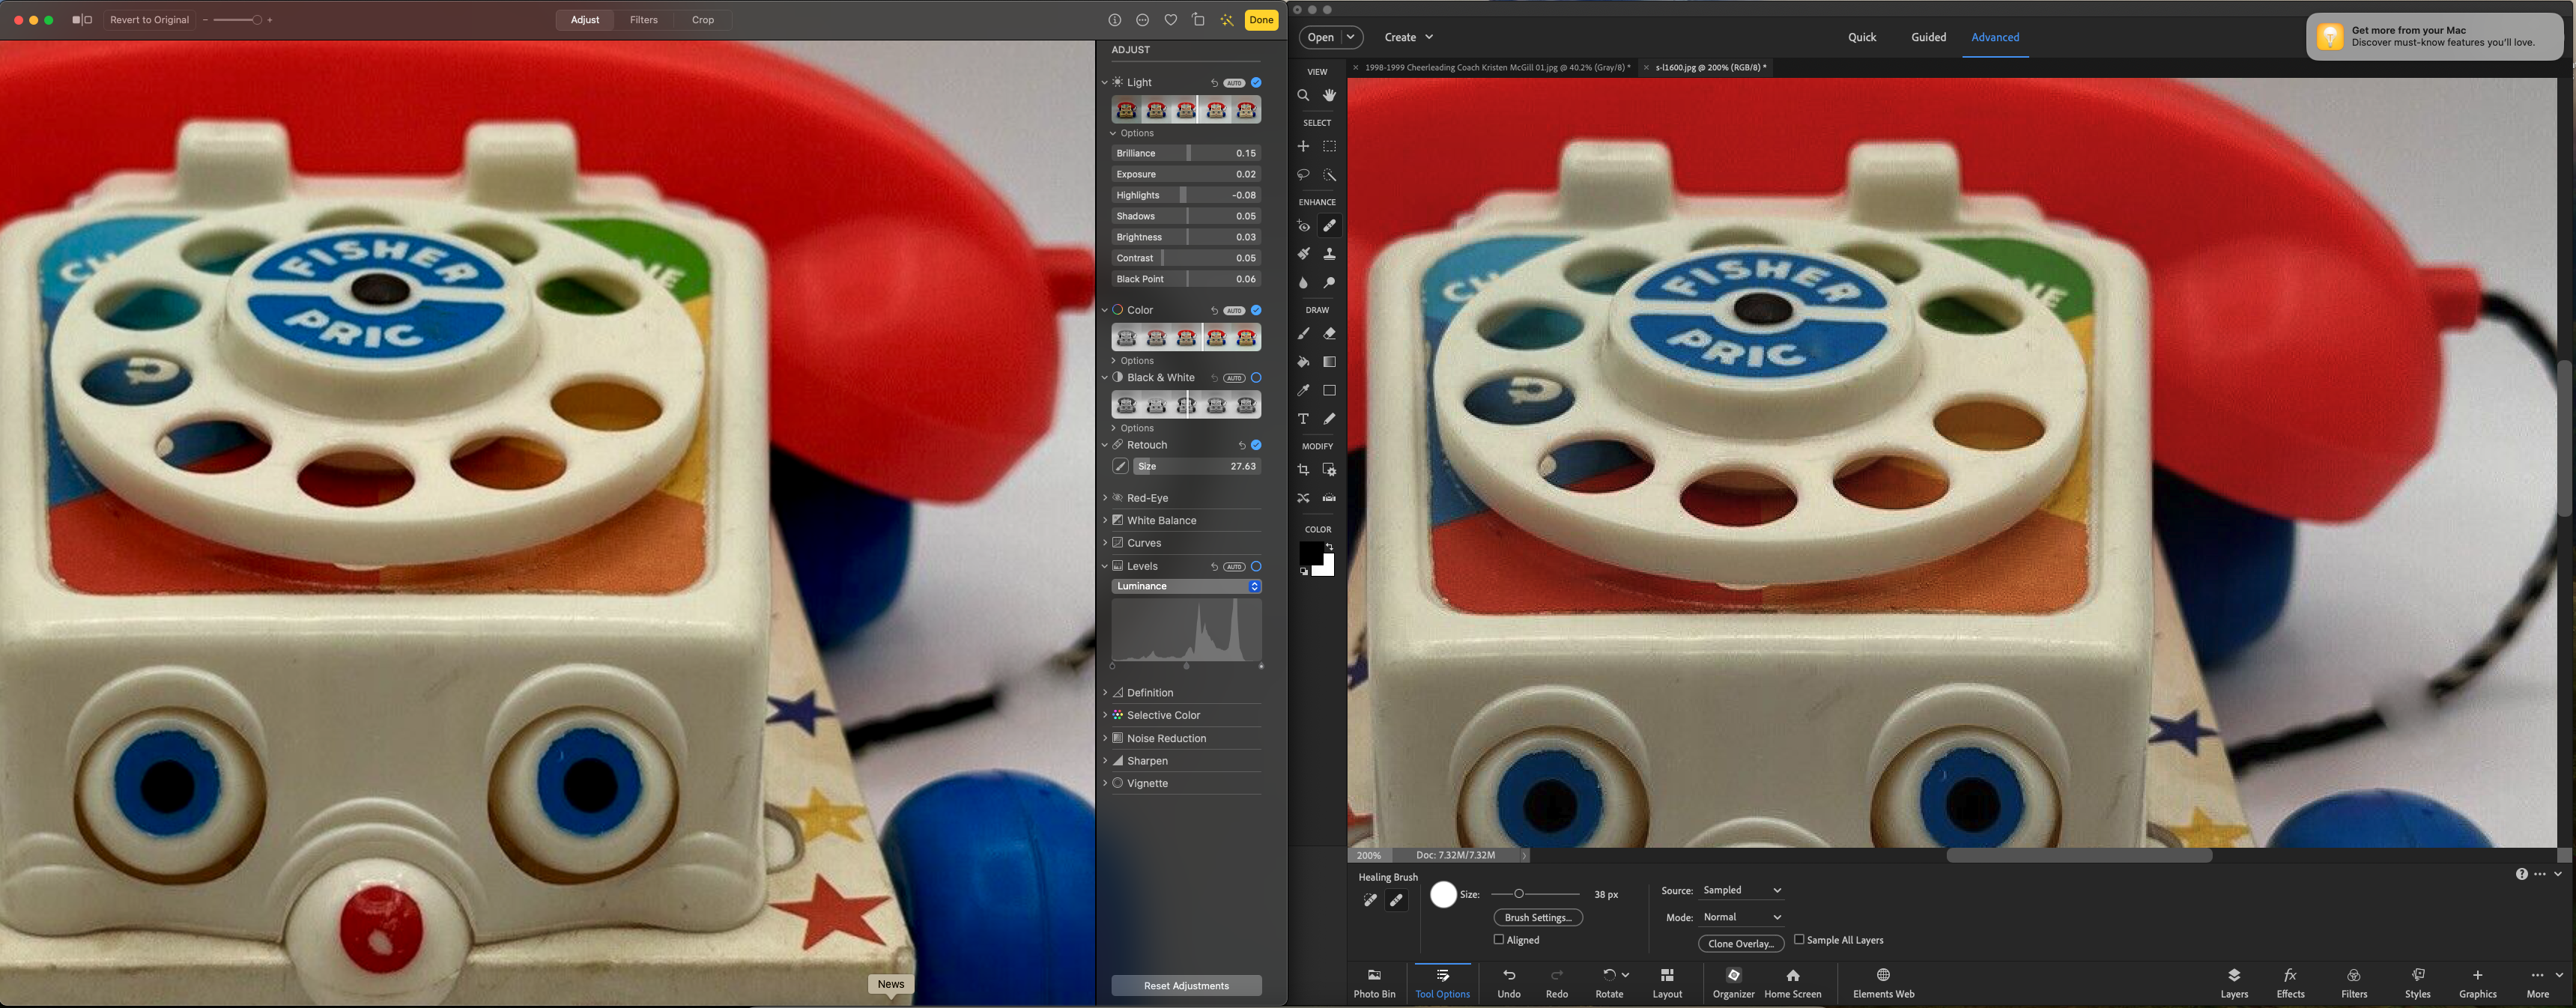
A favorite of my first batch of Fisher-Price toys was the Chatter telephone from our neighbors, the Robbins. It had a rotary dial which rang a bell when turned and released. When pulled, the phone made a “chatter” noise and the eyes went up and down. My phone’s body was made of wood, but its top, dial, handset, and wheels were plastic. You can see it sitting on the chair behind me in the photo, where I am sitting on a little stool my father had made in his high school shop class. I am wearing my red boots while watching our RCA Victor black-and-white television set, which was out of the camera view.

Watching television with my Chatter telephone on the chair behind me

In his study, my father had a special rotary telephone: a company phone tied into the network of Cities Service Gas Company. At the time, he was the Assistant Manager of Gas Control, helping ensure natural gas was supplied to cities across Kansas, Oklahoma, Missouri, Texas, and Nebraska. I enjoyed pulling my Chatter phone into his study, where I would imitate him, chattering away on my own phone, although I wasn’t talking about pipelines and compressor stations.

Fisher-Price had introduced their telephone toy in 1961. Mine was listed for $1.79 in the 1967 Montgomery Wards catalog, which would be $16 in 2024 dollars. At the time I played with my Chatter Phone, we still had rotary dial telephones in our home, although the Bell System had introduced “Touch-Tone” push-button phones in 1963.

Over the decades, rotary dial phones were gradually supplanted by push-button ones. Until 1983, we had to rent our telephones from them, and it wasn’t until we moved in the late 1970s that my parents paid extra to upgrade from rotary dial to Princess Touch-Tone phones. Back when we moved from near The Village to Bethany in the early 1970s, I know we were among the last to get numbers in the old SUnset 78 telephone exchange, as our number at the time, 789-0888, was quite slow to dial. Late in that decade we moved again, and our new neighborhood, Windsor Hills, came with the WIndsor 94 telephone exchange. But when I was a kid, while I was dimly aware of the old telephone exchange names, they were no longer in regular use.

In 1968, Fisher-Price introduced a push-button non-pull phone, and Fisher himself retired in 1969. The company was sold to Quaker Oats, which continued to offer other more modern variations of toy telephones, but the increasingly anachronistic rotary Chatter phone was still popular. Mattel bought Fisher-Price back in 1993, and it still sells a modern version as well as authentic reproductions.

The Fisher-Price toy that I remember quite clearly was the last I received: the Play Family Action Garage that was given to me for my fourth birthday in 1970.

It was new that year, completing the firm’s trilogy of Play Family toys of the Play Family Farm in 1968 and the Play Family House in 1969. The garage was three stories with a car and pedestrian elevator, a ramp, a service lift, and four cars with “Little People” figurines that had a wood peg-like body and wooden spherical head that “plugged” into the cars.

A crank on the side of the elevator would lift the car elevator and the passenger cab, with little stop signs popping in and out of place on each level. A bell rang on each level, and when it reached the top, a car would spring out of the elevator to zoom down the ramp. You could also roll a car to a hand-cranked wheel on the top level to align it with some marked parking places.

My original set also had a cardboard Play Family Service Van where you could store the accessories; that was soon discontinued. The playset was $10 in the 1970 Montgomery Wards Christmas catalog, which would be $77 in 2024 dollars.

I also had a separate tow truck with its own car it could pull. I had at least eight Little People figurines which were wooden pegs with spherical round wooden heads, plus Lucky the Dog. I remember being annoyed that I couldn’t pull the driver out of the truck: he was just a wooden head screwed into the base.

My playset was so old that all of the figurines were white; in 1971 Fisher-Price finally swapped in an African-American figurine for its Action Garage set for that and subsequent years.

Other Fisher-Price playsets I recall playing with, although I didn’t own them, include the Play Family Farm and the Fun Jet. The farm had plastic animals with movable heads and legs and a barn door that made a moo sound.

By the way, they still sell versions of the action garage. While it still has a gas pump downstairs, you can charge your electric car up top.

The modern Action Garage

So thanks to Herman Fisher, Irving Price, Helen Schelle, and many others who enriched my childhood and that of countless others, even if our memories of our oldest toys are fragmentary.

Posted in history, nostalgia, photos | Leave a comment

Mac Day 9: Organizing My Photos

Once I had transferred the 130,000 digital photographs on my Windows computer to my Mac, I was ready to contemplate my storage and sharing of photographs online. My workflows and uses of online services have shifted over the years, but they eventually stabilized into four main online repositories for my photos:

  • Flickr for public vacation photos, which were linked in blog posts
  • Google Photos for the occasional shared album shared with friends and family, and mirroring my iPhone and iPad photo libraries
  • OneDrive backup of my photo collections on my Windows computer, including the unedited and edited vacation albums
  • iCloud for shots taken with my iPhone, including Shared Albums with Wendy

I decided to take stock of the various subscriptions I have that include photo storage:

I decided to cut costs by not renewing Microsoft 365 Family and to contain costs by ensuring that I would not need to upgrade my Google plan. I delve into each service below.

Flickr

I settled on using Flickr to publicly share my travel photos back in 2006, when it was the most popular dedicated photo-sharing site on the web. I paid $24/year for a Pro account in 2007, and in 2024 that cost me $73. After adjusting for inflation, the cost of the service has doubled in 17 years.

I have 12,784 photos and 157 videos consuming 53 GB on Flickr, and they’ve collectively garnered over 2.3 million views. But Flickr faded over the years, with few interface updates and declining engagement. I used to get several solicitations each year from people either seeking permission to use one of my Flickr photos or offering payment for licensing. For awhile, unsolicited sales paid for the cost of my Pro account, but that hasn’t happened in years.

Flickr peaked about a decade ago | Source: Franck Michel

I still like how interested people can go to Flickr and browse my public photo albums, and many of my blog posts link to albums there, so I will keep that account and continue to use the service, mainly for vacation photos. I don’t want to post my vacation photos directly in WordPress. I pay $42/year for its Starter Plan, and that only provides me 6 GB of media storage, and I’ve already used 35% of that with graphics across my many posts.

My Flickr albums view

Google Photos

I’ve used Google Photos for various projects over the years, but I’ve never really liked it. I created some albums to share with others, but the process is cumbersome, and I have discovered that any descriptions I type in for a photo on Google Photos, or a photo stored in Google Drive, are NOT retained in that photo’s metadata when it is downloaded. So that isn’t a productive use of time for a service I don’t really like very much.

Google Photos albums can be shared, but the service is not set up to allow the public to browse a set of your albums. Here’s what a sample album looks like in Google Photos:

What a Google Photos album looks like if I share a link

And here is what the same album looks like on Flickr:

A public album of the same photos on Flickr

While setting up my Mac, I installed Google Drive for Desktop to make it easy to access my personal and district Google files in the Finder. That prompted me to check my settings.

Google Photos once provided unlimited free storage of photos up to 16-megapixels, but it now limits you to 15 GB of free storage shared across Google’s Photos, Gmail, and Drive services. I’m currently paying $30 per year to expand that to 200 GB. I was using 73 GB for Google Photos and 77 GB for the other Google Services, and Google has been warning me that at my current fill rate I’ll be out of space in about a year. Their next tier is 1 TB of storage for $100/year.

I do not want to pay more for Google given how much I’m already paying for Flickr, Amazon Prime, and Apple One Premier. Google Photos was duplicating all of the photos on my iPhone and iPad, and I don’t need that since I have access to those on my Mac and in iCloud+. At one time I thought I might use the smart features in Google Photos to locate photos, etc., but I never found time for that.

I experimented by seeing what would happen by switching the Google account from uploading photos in Original quality to Storage saver and compressing everything with Storage saver. That only reduced my photo usage from 73 GB to 67 GB.

I decided to delete all of my photos in Google Photos to avoid a subscription increase. That turned out to be a tedious process. For safety’s sake, I deleted the Google Photos apps on my iPhone and iPad, to be certain that any integrations wouldn’t delete photos from those devices’ built-in photo libraries. Then I had to select the first photo in Google Photos on the website, scroll down some distance, hold down SHIFT, and select a later photo. That would select all the photos I had scrolled past, and I could delete them.

It didn’t work to select the first photo and rapidly zip down to an earlier date with the right timeline sidebar to select the last one: that didn’t select the photos in-between. A perusal of the internet showed that Google hasn’t made a provision to bulk-delete your photos. So I went through the manual process, deleted thousands of photos at a time.

I deleted all of my photos from Google Photos to ensure I wouldn’t have to pay for more storage

OneDrive

In my previous post, I shared my plan to allow my Microsoft 365 Family subscription expire in June, so I didn’t bother creating an album example for this post, and I’ve actually never created any albums there. But for a couple more months it will be the online backup for the 130,000 photos stored on my Windows desktop computer.

Amazon Prime

It was only when writing this post that I learned of Amazon Prime’s photo storage and sharing service. As a Prime member, I have unlimited storage there. Now, I know all too well that Amazon is run by sharks, and they are likely to change their terms or even drop the service altogether at some point. Google and Apple are less likely to drop their photo services since they are selling points for Android and iOS hardware.

Here is an album of the same photos on Amazon Photos:

Sharing the same photos with Amazon strangely doesn’t include the title of the album

The album title was omitted, so despite the unlimited storage, I’m skeptical of sharing photos with that service. However, at least for now I have unlimited storage of photos at full resolution there as part of my Prime membership.

So I went ahead and downloaded, installed, and set up the Amazon Photos app on my Mac, telling it to maintain an online backup of my photos on my external drive, as I had been doing with OneDrive for the photos on my Windows desktop computer.

Apple Photos

I saved the obvious photo service for a Mac user for last. I purchased Apple One Premier in late 2020, at the same time I ordered the Mac Mini. We were amidst the COVID pandemic, with no vaccines yet, and I decided it was worth $30/month to get the Music, News+, and tv+ services along with plenty of iCloud+ storage.

However, I was skeptical I would make any use of Fitness+ since I have long had my own morning aerobics routine, or Arcade, since I’ve never been much of a gamer. What sealed the deal was the ability to share all of those services with five other people, so I could give Wendy and my closest friends using iPads and/or iPhones the same benefits. The service had climbed to $38/month by December 2023, which is about 6% above the old pricing if you adjust for inflation.

I get 2 terabytes of storage with that service, and I was using 200 GB of that: 132 GB for 22,747 photos and 454 videos, 42 GB of documents, 20 GB of backups, 2 GB of text messages, and 55 MB of emails, which is cute since I rarely use the default Mail app on my iPhone or iPad, mostly using Gmail.

Those photos only partially overlap with the 130,000 photos on my home computer. I had only managed the iCloud+ photos in album form using my iPad. Also, Wendy and I like to create a Shared Album on each trip. So I had 175 of My Albums and another 95 Shared Albums.

As my number of albums multiplied, they had become harder to manage on my iPad and iPhone, and I had wished for a way to nest them so that I could put travel albums in one group, history albums in another, etc. I didn’t know of a way to do that in iOS until I Googled the topic today. It turns out that you can do that on an iPad by tapping All Albums in the sidebar, then tapping +, then New Folder. However, I find selecting a dragging albums on an iPad cumbersome; I’d much rather organize them on a big screen using a mouse. So it was time to start doing just that with my Mac mini.

The secret to creating Folders for your photo albums in iOS

Before I went to town on that, I decided to look into what renaissance man Michael Wray had shared with me: that you can create separate photo libraries on a Mac and, since reportedly the photos or their index are all in one file, that could get corrupted. So he always has a backup and chooses to create separate libraries for different events, clients, etc.

I opened Photos on the Mac, and it complained that the photo library file was in the trash. I tried creating a new one, but it wasn’t showing all of my iCloud photos. I had to locate my “System Photo Library” and enable iCloud syncing for it.

That made my multitude of disorganized iCloud albums visible, and I was able to organize that mess into 10 folders and then sort the albums in them alphabetically. It was a bit confusing in that you can only nest folders, not albums, and there is a bug when you try to create a new album in a folder. At first that correctly created a blank album, but later it would just duplicate the contents of the current folder. I could only get it to return to creating a blank album by closing the Photos app and re-opening it.

iCloud photos after the sorting

Unfortunately, Apple doesn’t support folders for Shared Albums or sorting Shared Albums except by date. So they remain a bit of a mess.

As for the 130,000 photos on my Mac’s external drive, I can’t simply add them into iCloud, even though I have plenty of space in the service, because that would then mirror onto my iPad and iPhone, and I don’t have enough storage on those devices.

I debated creating separate libraries on the Mac, that wouldn’t sync to iCloud, and using those to organize the photos. However, I already had the 130,000+ photos on my Mac sorted into file folders on the external drive. Now I was backing all of that up to Amazon Photos, which appeared to have similar search functions as the iCloud/iOS/Mac Photos apps, albeit how well they worked was still uncertain. So for now I decided to stick with just one Photos library on the Mac, synced with iCloud.

Workflow Changes

When I was using Windows, our vacation photos in a Shared Album would get downloaded as a ZIP file and extracted to a folder on my SSD. Then I’d build up a subfolder of selected shots, touch them up in Adobe Photoshop Elements 2018, and then upload them into a new album on Flickr for inclusion in blog posts.

That worked, but it was messy and redundant. Our best photos might end up in nine different locations, with only two of those being the final edited product. I could go back through dozens of folders to delete unedited shots, but that isn’t a good use of time.

I’m hoping to shift my workflow so that I keep the final edited album in iCloud, doing all of my edits in the Photos app, including the more advanced tools available in the macOS version. If I have to, I can do additional work in Gimp and then load the photo back into the iCloud album. Then I’ll upload them into Flickr. That would avoid creating folders on my external drive that are backed up to Amazon Photos.

What’s Next?

Getting my photos shifted and re-organized was my largest concern about shifting from Windows to the Mac. I’ll get some practice this summer with my new workflow after Wendy and I return from a vacation in southern Oregon and northern California.

The last “big thing” about moving to the Mac is its tighter integration with Apple One services and the various macOS counterparts to many of Apple’s own iOS apps. After I gain more experience with all of that, I’ll share. But I think this eighth post in a row about moving to the Mac is enough…for now.

As a kid, I learned that Eight is Enough
Posted in Mac, photos, technology | Tagged | Leave a comment

Mac Day 8: Shifting 130,000 Photos

Digital photography, like many things, is both a blessing and a curse. I love how I can readily create, manipulate, and share digital photos. But the ease of their creation has already allowed me to build up over 130,000 of them on my desktop computer since the year 2000.

My first digital camera was the Nikon Coolpix 990 in 2000

The Nikon Coolpix 990 was my first digital camera. It cost $1,000 and took 3.1-megapixel 2048×1536 images. I bought six more dedicated digital cameras over the next 16 years, culminating in my Canon EOS Rebel T6 which takes 18.7-megapixel 5184×3456 images.

Along the way, I relied more and more on the ever-improving tiny cameras in the seven iPhones I purchased from 2008 to 2022. My iPhone 14 Pro takes 12-megapixel shots with a 48-megapixel sensor. My shot count was high enough before I started carrying a capable camera with me everywhere I went!

OneDrive

I have used Microsoft software for the entire 42 years I have had my own personal computers. My first, a TRS-80 Color Computer, was an 8-bit computer with 32 kilobytes of RAM, and it ran Microsoft Extended Color Basic. Later I used MS-DOS and then Windows from versions 1.03 in 1986 to 10 in 2024. I’ve been using online storage with Microsoft since at least 2008, and I’ve been paying $100/year for Microsoft 365 Family since 2014.

I have one terabyte of OneDrive storage, and for years I’ve used that as a backup for the photos on my desktop computer. My 130,000+ photos consume 340 GB there, organized into the same folders as on my Windows desktop computer, and folders and photo albums are distinct things on OneDrive. Those photos do not fully overlap with the 22,747 photos consuming another 132 GB of space in my iCloud+ account through Apple One Premier, which all came from my iOS devices.

I hope to finally let my Microsoft 365 Family subscription expire in June. However, letting go of OneDrive means I need to ensure my personal photos collection, distinct from the snaps in iCloud that were taken with iOS devices, is up in the cloud as well as backed up at home. Getting them accessible on my Mac was the first priority.

Transferring my photos to the Mac

My Mac SSD was too full of my photos

Since I was only rarely using my Windows desktop computer anymore, I decided to transfer all of the photos on it to my Mac Mini and then figure out how to re-organize them. Since both computers were wired into our home network, I used Apple’s Migration Assistant to copy them over. The files transferred at about 100 MB/s, so it took about an hour.

Back in 2017, I spent $545 for a 2 terabyte Crucial MX300 solid state drive (SSD) for my Windows desktop computer, and it has always worked perfectly. What a contrast to the years of spinning hard drives that would inevitably crash after enough years of use.

However, my 2020 Mac Mini only came with a 500 GB SSD. Apple is notorious for overcharging for things like memory and storage, and I wasn’t willing to pay their premium price back in 2020 for a one or two-terabyte SSD. Copying over all the photos left me with only 22 GB free on the Mac’s internal drive, which was less than 5%. That was unsustainable.

Rather than delete all of the photos and try again later to get them off the PC or download them off OneDrive, I decided to buy an external SSD for my Mac. I already had a 2 TB Seagate drive, but it was my Windows backup drive, and it was a spinning hard disk drive with a maximum transfer rate of 120 MB/s.

I also had a 1 TB Samsung SSD with a maximum transfer rate of 540 MB/s, which I bought for any emergencies knowing that if nothing else, I could use it in a few years when I retire; I currently have about 363 GB of data in my district account and have built up about 70 GB of files in the online district archives. Whenever I retire, I’ll sift out anything that is the property of the district or protected by FERPA, but the rest I plan to copy to ensure decades of work products are protected and available. If I were just going to have a Time Machine backup for the Mac’s SSD, that 1 TB drive would suffice, but I didn’t want to cram a backup and all of my photos on a drive that might get filled up in a few years.

My new external 2 TB SSD is quite small

The Mac Mini has two extremely fast Thunderbolt/USB 4 USB-C ports rated up to 40 GB/s. So I spent $158 for a two-terabyte Crucial X9 Pro SSD with theoretical transfer rates of up to 1050 MB/s. Although I’m used to tiny external SSD units, I was startled when I unboxed the new SSD. It was only 2.56×1.97×0.39 inches (65x50x10 mm). I’m still amazed when I think back to the 10-megabyte hard drive I used at the Oklahoma Department of Tourism in the 1980s that was the size of washing machine…this device is smaller than my palm and has 200,000 times as much storage.

I plugged in the SSD and promptly used Disk Utility to erase its Windows-compatible exFAT format and replace that with Apple’s APFS, which is optimized for SSDs on Macs. That only took seconds, and then I used the Finder to copy all of my photos from the Mac to the external drive. It took 11 minutes and 20 seconds to copy 371 GB, for a transfer rate of 540 MB/s, which was certainly plenty fast. That got me back up to 392 GB of free space on the Mac’s internal SSD.

Backups

My current backup philosophy is that for important files you always want to have accessible, in addition to a copy in the cloud you should have at least one and preferably two local copies. Before cloud storage became affordable and reliable, I insisted on two on-site physical copies and an off-site physical backup, although I’ll admit the off-site ones were sometimes months out of date.

I remember spending hours swapping 5.25″ inch 360 KB or 1.2 MB floppy disks and then 3.5″ 1.44 MB floppies, then Iomega ZIP drive 100 MB disks, and for some years listening to tape drives whir for hours. I used recordable DVD optical discs a few times, and then spinning external hard drives. The diligence paid off, since I seldom lost any data, but it was a pain.

My 2004 and 2009 Windows machines had RAID 1 redundant spinning hard drives for backup, and by 2015 those RAID 1 configurations had allowed me to survive at least four hard drive failures. I finally shifted to solid state drives in 2015, and I have never had one fail, although I do have an old backup of my current Windows machine’s SSD on that 2 TB Seagate spinning external drive.

At this point in the process, I had my 130,000+ photos organized into files folders in three locations: my Windows desktop’s SSD, the external SSD on my Mac, and up in the cloud in OneDrive. An old subset of them should also be in the outdated backup on my Seagate drive. But I had no backup yet of the Mac itself. Granted, there wasn’t much on it yet, and a lot of my data is online in my personal and district Google Drive accounts, but years of experience told me to not wait too long to get the Mac backed up.

I owned a 2010 MacBook Air and for well over a decade I listened to the MacBreak Weekly netcast, which covered iOS and Apple TV as well as Macs. But when the pandemic hit and disrupted all of my routines, I stopped watching Léo Laporte’s TWiT shows. For the past few years, I’ve done my morning exercises watching late-night monologues. Their reliance on political humor isn’t mentally healthy, so I’m re-subscribing to MacBreak Weekly, which I can easily watch on the Mac via its Podcast app along with catching it on my iPad.

All that meant I knew the backup method for Macs is Time Machine. The internet told me I could create an additional APFS volume on my external drive which I could set to be used for Time Machine, or I could partition the drive. If I used an APFS volume, it could grow if needed at the expense of the volume where I stored my Photos. I wasn’t interested in that, so I partitioned the external drive into two one-terabyte APFS partitions and set up Time Machine on the new one.

Before the end of June, I need to get my photos into a different place in the cloud if I’m going to let my OneDrive subscription expire. I thought I might just put them in iCloud+, as I have plenty of storage there thanks to my Apple One Premier account. However, that would overload the available storage on my iPad and iPhone. So I need to examine my options.

But I already have 270 photo albums built up in iCloud that needed to be organized first…more on that in the next post.

Happy computing!

Posted in Mac, photos, technology | Tagged | Leave a comment

Mac Day 7: Draw with Magnitude & Direction

For 28 years, I taught students about vectors as representations of physical quantities with magnitude and direction, and how adding, subtracting, and multiplying them differed from the “scalar” mathematics they were used to. We covered the vector cousins of common scalar quantities, such as displacement adding direction to distance, velocity adding direction to speed, and so forth.

Vectors are also used in computer graphics, with images created using a sequence of commands or mathematical statements that place lines and shapes in a two-dimensional or three-dimensional space. That contrasts with bitmapped or rasterized graphics of a grid of colored pixels. Photographs are represented with bitmaps, while scalable diagrams are best handled with vectors.

The most famous early use of vector graphics in popular culture was the original Asteroids arcade game released by Atari in 1979, made possible by directly manipulating the electron beam in a cathode ray tube to draw shapes. In a typical television, the beam instead would scan across and down the screen repeatedly in a set pattern to create a raster, rather than a vector, image.

Asteroids used vector graphics

In my previous post, I explored editing bitmapped photographs on my Mac, and I decided to wait and see if the default free Photos app will suffice. If not, I’m prepared to spend $70 on Adobe Photoshop Elements 2024. But what about vector graphics?

Thankfully, the free online Google Draw, which is part of Google Docs, has vector tools which are sufficient for most of my needs.

Should I want something more sophisticated, my go-to in Windows has long been Corel Presentations, which descended from 1990’s DrawPerfect. Professionals might use Adobe Illustrator, but that is too complex for my needs, and I have no interest in paying for a monthly or annual subscription for Adobe Creative Cloud after I retire.

Inkscape is a free open source vector editor that runs on Windows, Mac, and Linux. I was a bit skeptical of it, given that its free open source counterpart in advanced bitmap editing is Gimp, and I wasn’t impressed with Gimp’s interface.

Fidding around with Inkscape

I found Inkscape a mix of familiar and strange. I am used to right-clicking an object and selecting a menu option for a rotation, but in Inkscape you click an object once while in cursor mode to get resizing handles and again to get rotation and skew handles. Once you know the trick, it’s a fine approach.

Inkscape has a more limited set of shapes than some programs, but it can manipulate them in sophisticated ways. If I ever needed to go beyond Google Drawings and used Inkscape, I’d definitely need to use Help > Tutorials to figure out some of the basics. I’m not a fan of surrounding all four sides of the editing area in tiny icons, but I feel pretty confident that between Google Drawings and Inkscape my vector drawing needs will be met.

I have dabbled in Cartesian coordinates, but vector geometry is where I draw the line.

Posted in Mac, technology | Tagged | Leave a comment

Mac Day 6: Healing Arts

I used Windows at home for almost 40 years, but I’m now switching to an Apple Mac Mini. An earlier post explains why. This post is about my search for how to touch up photos on the Mac.

I have about 130,000 digital photos thus far, and that will not only grow as I snap more of them, but also as I slowly digitize my parents’ photo albums and eventually some of my own analog prints. I like to share photos on Facebook and include some in my blog posts, and I’ve learned how to do some basic touch-ups.

Back in 2010 I attended a one-day digital photography workshop with Jerry Poppenhouse, who traveled the world doing photography for Phillips Petroleum for 27 years and then taught at OSU Okmulgee. In addition to giving us pointers on composition, he showed us novices how to use the burn and dodge brushes in bitmap editors along with adjusting highlights and shadows and the like.

My Windows ways

The three programs I used to edit graphics in Windows were quite venerable and the versions of them which I was using dated back six years or more.

For 20 years I have relied on the Thumbsplus Pro program for Windows to view, organize, and edit most of my graphics. It is easy to use for rotating, cropping, resizing, converting, and making basic adjustments to contrast, saturation, and gamma. It also has a few useful filters for sharpening and the like.

ThumbsPlus has been my go-to graphics viewer, organizer, and editor in Windows for over 20 years

But if I needed to burn or dodge a photo, adjust shadows or highlights or lights levels, or use a healing brush, those weren’t available in ThumbsPlus. I had tried Adobe Photoshop, but it was overwhelming for my basic needs, and its later conversion to monthly or annual subscriptions was a turnoff.

So back in 2009 I bought Adobe Photoshop Elements 8, then 10, and most recently Adobe Photoshop Elements 2018 (which was version 16). I used it mostly for adjusting highlights, shadows, and levels, correcting camera distortion, touch-ups with the healing brush, noise and dirt reduction, and the occasional burn or dodge.

I used Adobe Photoshop Elements 2018 for photo touchups beyond the abilities of Thumbsplus

When I wanted to do precise editing of bitmapped graphics or wanted to create vector graphics, I used Corel Presentations X7 software from 2014, which was the descendent of the 1990 MS-DOS application DrawPerfect by WordPerfect.

I used Corel Presentations X7 for fine-detail bitmap editing and for creating vector graphics

Bring out the Gimp

I looked for some recommendations online for powerful but inexpensive photo editing on a Mac. I knew Apple offered Aperture from 2005 to 2015, but the tight integration of Adobe Photoshop and Lightroom (Classic) prevailed. I don’t need the full-blown capabilities of Photoshop or Illustrator, and I have no interest in an Adobe subscription once I retire and no longer have access via a school account.

So I decided to first check out a free open-source graphics editor: Gimp. It has been available for many years and runs on Macs, Windows, and Linux. Its origins are given away by its full name: GNU Image Manipulation Program, named after the GNU version of Linux. (And GNU is itself a recursive acronym for GNU’s Not Unix. Soooo nerdy.)

Speaking of nerdy, take a look at the Gimp interface:

Gimp was a plethora of icons scattered across a dozen different areas on the screen

Oodles of tiny little icons, and a dozen different areas on the screen. That looks even worse than Adobe Photoshop:

Photoshop suffers from a similar outbreak of icons [image source]

Thankfully, you can hover over an icon or an area of the screen and get a brief explanation of what it is about. A bit of noodling around showed that Gimp was no wimp: it has many features this hobbyist associates with Adobe Photoshop, such as layers.

I had Gimp open in a window on the right half of the screen. After hovering over the different areas to see what they did, I thought, “Something is missing here.”

Being a four-decade Windows user, I had to remind myself to look at the top left of the screen, with the Gimp window selected, to see the application’s menu bar. There were the additional controls for…oh, good grief…if I click in my Chrome window to type this blog post, the Mac’s menu bar changes from Gimp to Chrome, so I can’t see the Gimp menu options to type them. In Windows, that wouldn’t be an issue, since its application menus are within each window. I guess I’ll just provide a screenshot of the Gimp menu bar:

Fonts

In messing with Gimp, I used the text tool and that provided my first glimpse into the default fonts of a Mac Mini…or perhaps just Gimp? The Google search engine’s Search Generative Experience, its experimental AI overview in search, stated that the Mac has separate folders for system fonts and for application fonts. In Windows, I just worked with one folder of fonts.

FYI, I only see the Search Generative Experience when I’m logged into a personal Google account at home. At work I use Google Workspace for Education, and Search Generative Experience is not enabled for it yet.

Many of the fonts were familiar, but many were not. I was surprised to see Arial in the list; I kind of expected that Helvetica imitator to be omitted. That prompted me to find out that I could use the Mac’s Font Book app to add fonts, and I diverted to find out my Mac had 470 fonts installed. Marcellus SC, which I picked out long ago for the school district logos, wasn’t included, so I added that. The Bruins logo also uses Blaze Italic, so I popped that in as well.

I’d rather draw than paint

The aftermath of my initial experiments with Gimp; it has many bitmap tools I’m used to, but its ability to draw basic shapes is gimpy

After playing around with a few tools in Gimp, I wondered how to draw simple shapes, since while I do some retouching of bitmapped images, I also often have cause to draw lines, circles, boxes, and the like. Gimp has ways to draw lines, rectangles, and circles, but they are somewhat counterintuitive kludges for a program that is clearly oriented towards bitmap editing.

I tried the healing brush in Gimp, and I wasn’t impressed. With some fine tuning, it could work for me, but I suspect it would exhaust my patience. So I gave up on Gimp, unwilling to navigate its interface on a regular basis for my relatively simple needs.

What to try next?

Those who live in mud houses…

I had already paid $80 back in 2017 for Adobe Photoshop Elements 2018. Could I use that license to get the Mac version for free?

I went to https://account.adobe.com/products and looked at my registered products. I once had a personal Creative Cloud subscription, but this was showing me standalones I purchased and registered over the years:

  • Acrobat 6 for Windows in 2005
  • Acrobat Professional 7 for Windows in 2005
  • Acrobat Professional 8 for Windows in 2008
  • Photoshop Elements 10 for multiple platforms in 2012
  • Dreamweaver 12 for Windows in 2012
  • Photoshop Elements 16 for Windows in 2017

Hmmm…no mention of my purchase of Photoshop Elements 8 back in 2009; I guess I never registered that purchase with Adobe. Anyway, I could download the Windows version of Photoshop Elements 16, but not the Mac version.

I’ve spent $1,463 on the Mac Mini since December 2020. To put a different lens on costs, since I made the decision to switch from my Windows desktop to the Mac Mini as my primary machine, I’ve spent $232 on these items: a new keyboard and wrist rest, an SD card dongle, a book, and an external SSD; a future blog post will be about the SSD. Was I willing to pay $70 for Adobe Photoshop Elements 2024 for the Mac? Sure, given how often I edit photos, but first I wanted to see if a free bundled tool might suffice.

By default by design

By default by design
Time after time
Maybe you’ve earned it
Maybe you’ve spurned it
But you’ve got it
Yes, you’ve got it

-ABC, from Beauty Stab

I recalled that renaissance man and volunteer extraordinaire Michael Wray had sent me a tip that he organizes his photos with the Mac Photos app with different libraries for different events and clients. His focus was on the organization issue, but could the editing capabilities in Photos satisfy my hobbyist needs?

I’m familiar with the Photos app in iOS, having used its various functions for years, and while it can alter shadows and highlights and the like, it lacks a healing brush. To get that capability on iOS, I once used Adobe Photoshop Express, but I now use Snapseed.

I was pleased to find in the Photos User Guide that there is a Retouch brush in the Photos app on a Mac and along with more sophisticated Levels adjustments and the like. I decided to load the same image I had in Gimp, that of a vintage Fisher Price Chatter Phone, and try “healing” parts of it.

Puttering around with Retouch in the Photos app on the Mac; removing the E in Price worked fine, but taking a chunk out of the handset cord would require finer work than a few clicks of the Retouch brush

I also loaded a 1990s scan of a black-and-white film negative to see if the Retouch tool could deal with large specks and the like. Its handling of that was not awful, but it was noticeably inferior to the results I was used to getting in Adobe Photoshop Elements 16 for Windows.

I rechecked some online recommendations at Macworld and PCMag (I know, I know), and I decided to download the free trial version of Adobe Photoshop Elements 2024 for the Mac.

In my element

There was a warning that Adobe Photoshop Elements 2024 for the Mac only supported macOS 12 and 13, but the internet gave some indication it would work on Sonoma, which is version 14. I was a bit worried to see that there were known issues between Elements 2023 and Sonoma; I presume Elements sales for the Mac might be low enough that Adobe doesn’t put much programming resources into updates.

Elements 2024 on the Mac worked pretty much like Photoshop Elements 2018 on Windows after I switched the Mac version to dark mode; the default mode was too bright for my taste. I felt very comfortable in using it, and I appreciated the greater separation and clarity of its sidebar tools compared to the mess in Photoshop and Gimp.

I then edited the same images in Photos and Photoshop Elements 2024 side-by-side. I verified that Retouch in Photos was inferior to the Spot Healing Brush in Elements in retouching old negatives, and Retouch sometimes “hung” for awhile, leaving a dot on the screen where the brush had been applied. I’m guessing it might be using the cloud and experiencing server delays.

However, I didn’t see much difference between Retouch in Photos and the Healing Brush in Elements when editing the color photo of the Fisher Price Chatter Phone.

I’m holding off on purchasing Elements for now. My free trial lasts a month, and I’ve yet to work through my organizational scheme for photos on the Mac. Since it is likely that I’ll follow Mr. Wray’s lead and use Photos, I’d love to just use it for adjustments and avoid depending on Elements. But if Photos doesn’t meet my expectations, I can always plunk down $70 for Elements.

Before I tackle organizing my photos, however, I think my next step will be to look at vector drawing tools on the Mac. That might be the topic for my next Mac post.

Happy computing!

Posted in Mac, technology | Tagged | Leave a comment